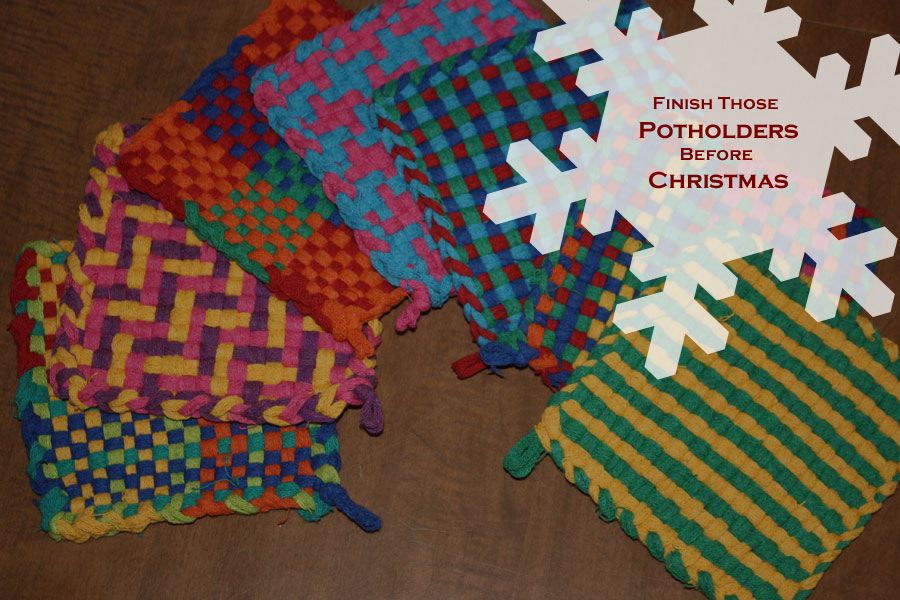
Great tips to easily and neatly finish your potholders before Christmas.
My boys love weaving potholders – it’s one of their favorite handcrafts. Potholders are quick and easy Christmas gifts for children to make and everyone we know loves receiving them. They last a long time even with hard use and going through the wash. (My mom still has some in her kitchen that my dad made for his grandmother, but those don’t go through the wash anymore.) Potholders are easy to weave even for very young children, but finishing them can sometimes be a bit tricky.
In this tutorial we show you step by step the technique we use to finish our potholders.
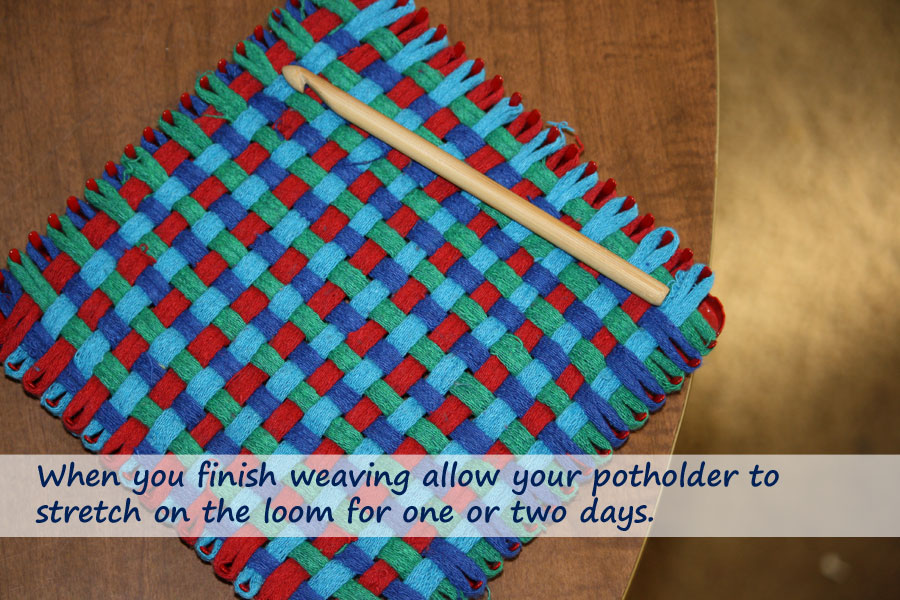 One of our best pieces of advice is to let your potholders rest and stretch when you are finished weaving. I know – it’s Christmas and your trying to make a lot in a short period of time and you don’t have time to let each one stretch for a day. We get around that by having more than one loom…well, we have a lot more, but that’s because we have six boys! Really, if you let them stretch, finishing them is much easier – it’s not so tight when you crochet the edges and the loops don’t pop of the pegs quite so easily…I did say quite. Read on, we’ll tell you how to fix that problem, too…
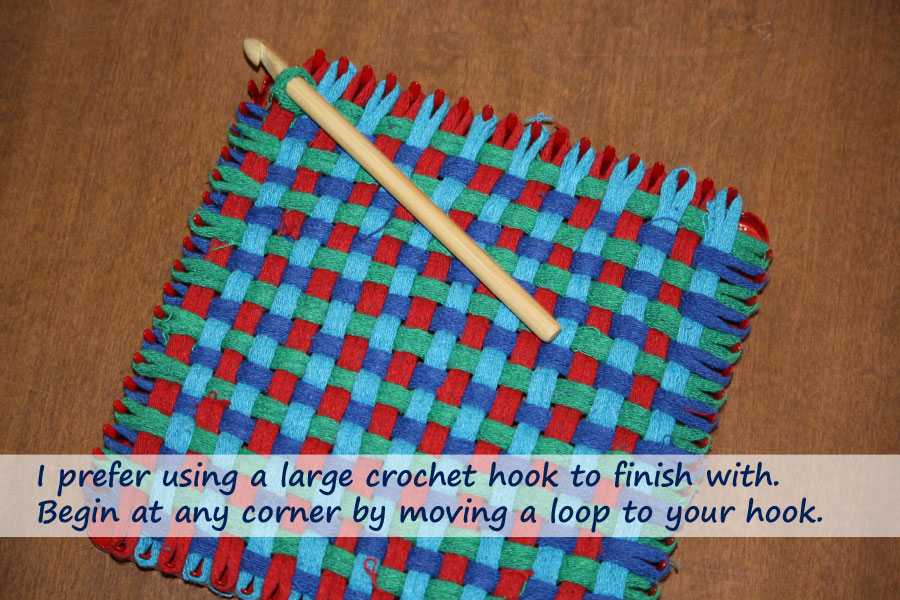 I’m not assuming that you know how to crochet. If you don’t know how to crochet finishing a potholder is a really good way to learn. We prefer to finish our edges with a large crochet hook like this bamboo one. Wood is a lot less slippery than metal and those wire thingy’s that come with your loom? Well show you what those are good for later.
The first step is easy – just pick a corner and slip the very first loop on that side on your hook.
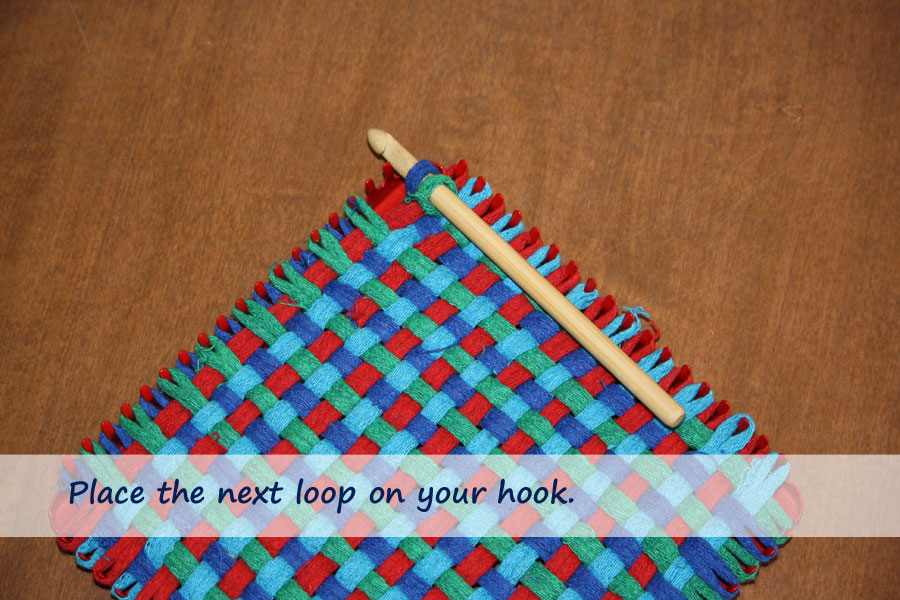 The next step is no more difficult than the first – just slip the second loop on behind the first.
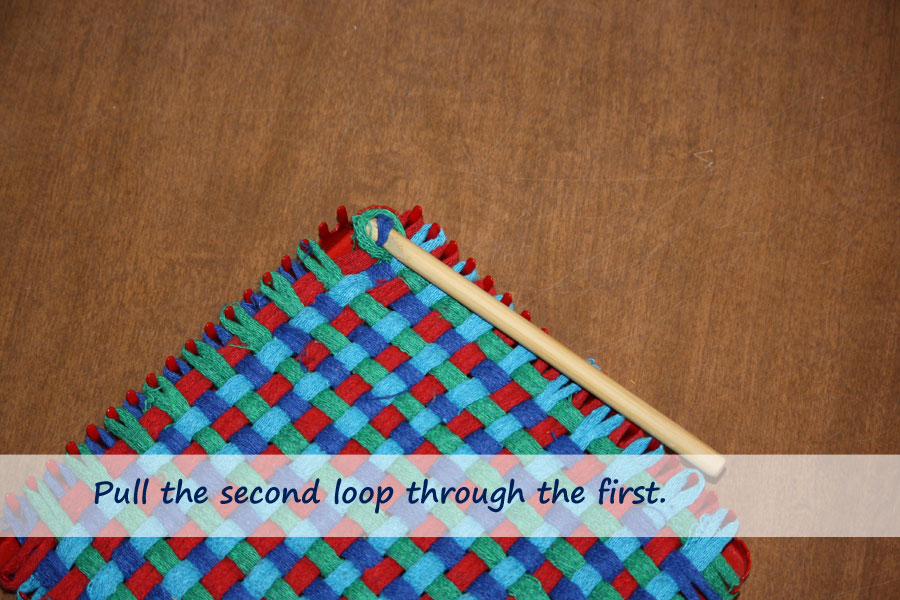 Keep your loom on a firm surface and with your hook begin to pull the second loop through the first.
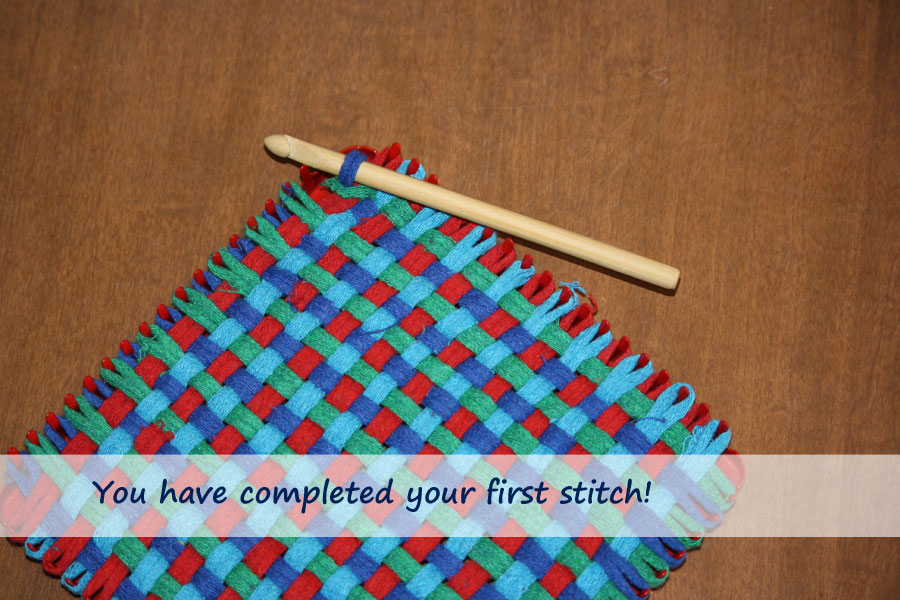 You just made your first stitch.
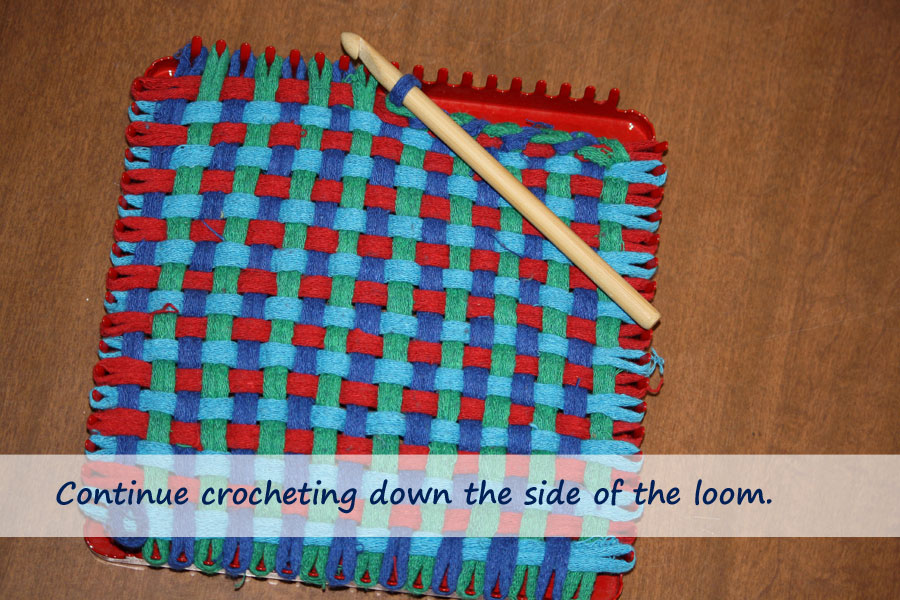 Keep that loop on your hook and slip the next loop off the peg onto your hook. Pull the second loop through the first again. Now you are crocheting!
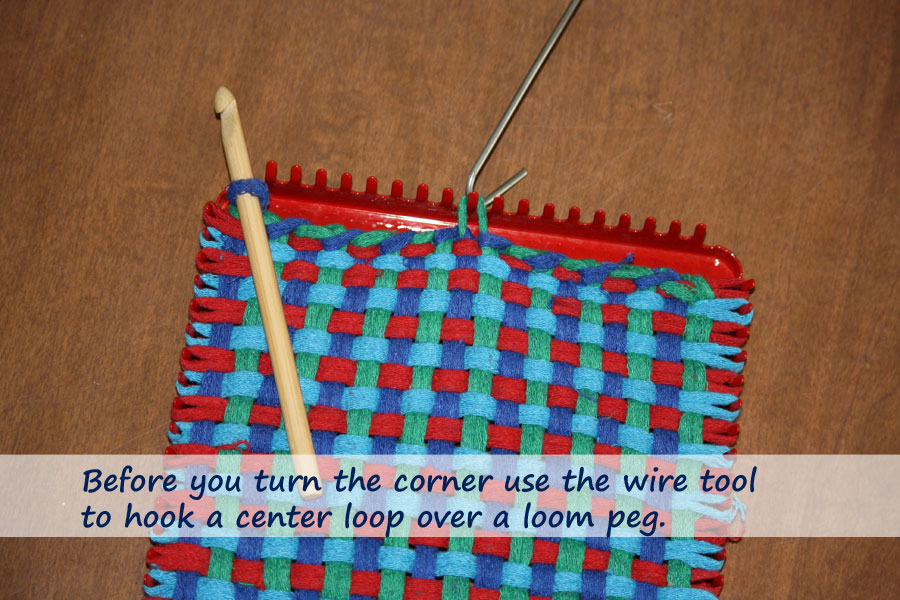 When you reach the last peg on the first side, stop before turning the corner. We are going to keep those little loops on those little pegs right where they belong. Use that wire thingy to pull one loop from the center of the side you just finished and hook it to one of the pegs. You sometimes have to pull hard which is ok with the wire – not with your nice crochet hook.
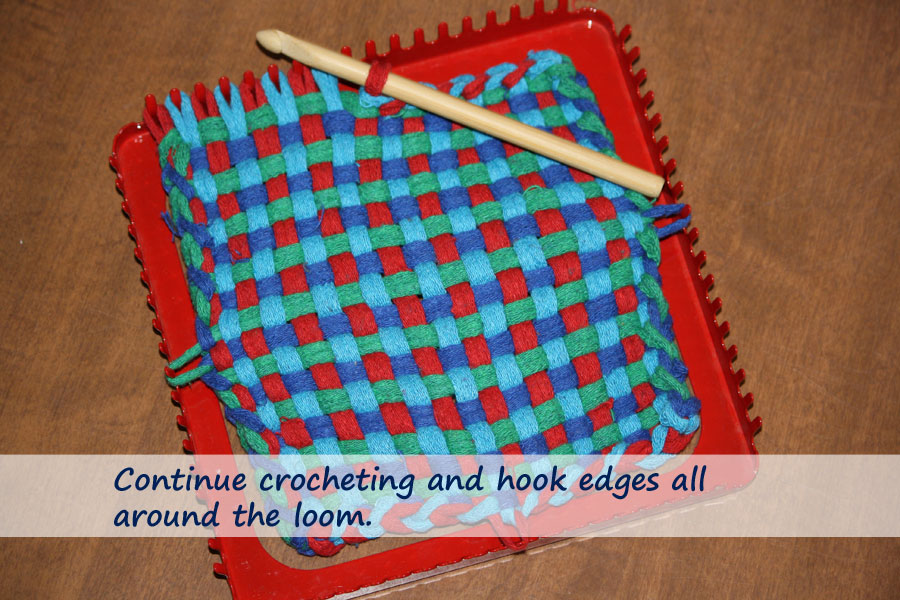 Continue in this same way around all four sides of your loom. You can see the tension created by hooking each side back to the loom when you’ve finished it. If you still have problems with loops slipping off the pegs you can gently push the little pegs back at an angle. This makes the distance between them longer and puts more tension on the loops and helps them stay put. In weaving tension is your friend.
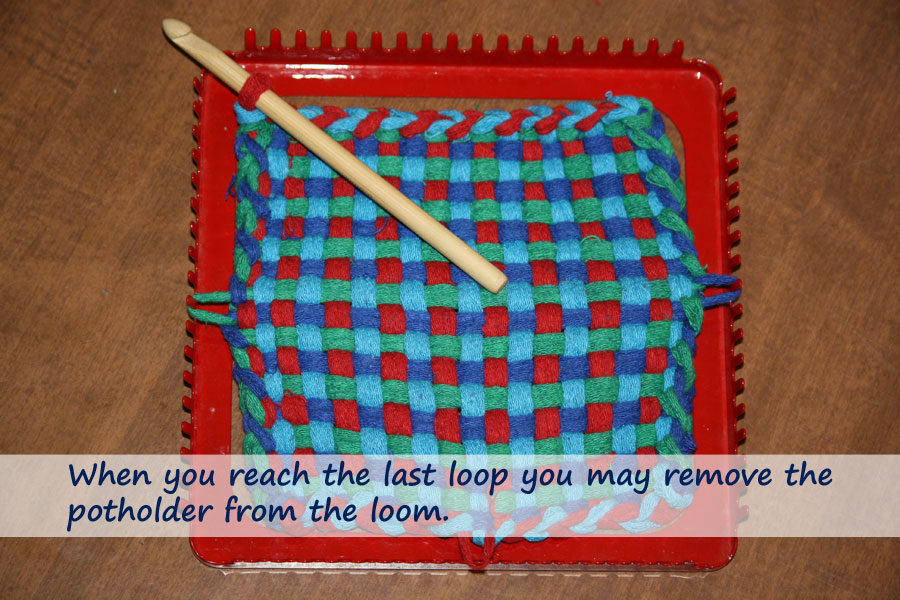 Now you’ve reached the end of the line and you’re left with one little loop on your hook. Take your potholder off the loom and hand it to another little weaver who will fill it up again. All you have left to do is pull it into shape.
 I pull the opposite side of the stitch I hooked over the peg to even it out. With these nice cotton loops you can’t even tell it was ever out of shape. I tug the corners and smooth and block the potholder with my hands.
What do you do with that last lonely loop? Some people yank it up tight and tie a knot in it. I used to do that, but it always makes one side of the potholder shorter. And then it’s all wonky and never looks just right. So now I’ve started just tugging and stretching it slightly – just enough for it to hang on the hook. I’ve never had any problems even in the wash. And now my potholders are very square and nice and flat just like a potholder should be.
If you like this tutorial click the like button in the Face Book box in our sidebar. Or visit the Big Green Chair Facebook page, check out our posts there and follow us. Then sign up for our email newsletter in our sidebar.
If you have questions about weaving potholders leave them in the comment section below.