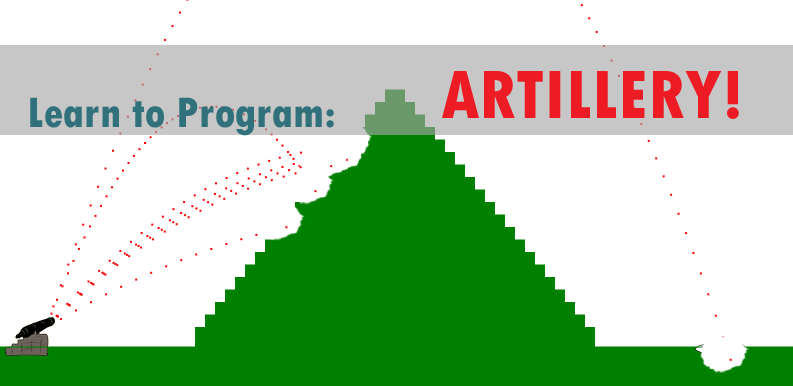
I want to teach my 16 year old son how to program. When I asked him what he would like to try to do he said, “I would like to make a game.” We settled on the game Artillery! in which you shoot over an obstacle and try to hit your opponent before they shoot you.
 I used Visual Studio to do this project and you can download a free version of Visual Studio Express 2013 for Web . Depending on your connection this can take awhile. You could also do the first part of this project with a simple text editor, but as we progress with this game in future posts, Visual Studio will be essential.
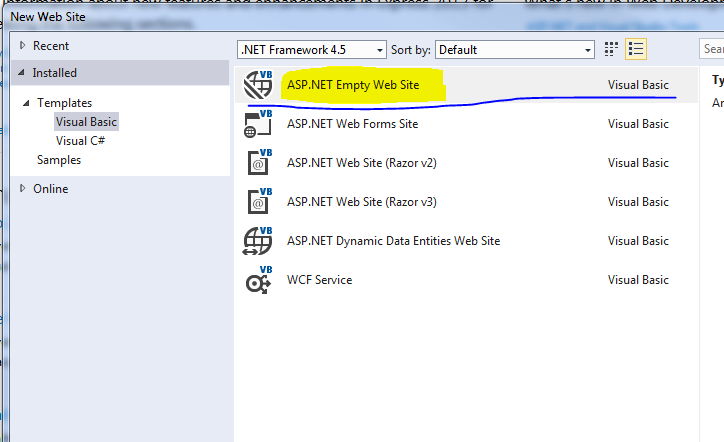
Once you have Visual Studio (VS) installed, open the application and click on ‘New Web Site’.
You will want to create an empty web site for this tutorial.
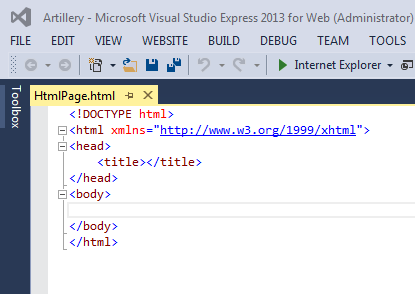
I named mine Artillery. Once the project comes up you will then create a new HTML file. The name is not important at the moment, so just go with the default.
Your page should look like this.
If you know HTML and are comfortable with the concepts of HTML just jump down to the section titled the javascript.
The HTML:
The first thing we will do is edit the title of the page. Let’s change it to “Artillery”. You do this by editing the title tags node to look like this.
<title>Artillery</title>
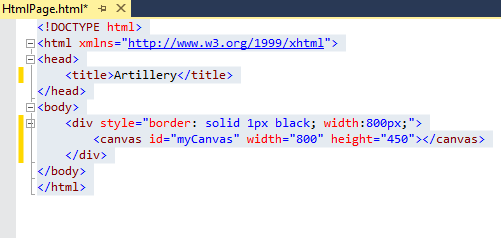
Next we will add a canvas tag to the body of the document and put it in a div with a border so that we can see it. Your document should look like the example below.
Notice that in the style attribute on the div we specified the border to be a solid line, black and 1 pixel wide. On the canvas we defined the width to be 800 pixels and the height to be 450 pixels. The canvas height and width are important to this project and you will see why in a few minutes.
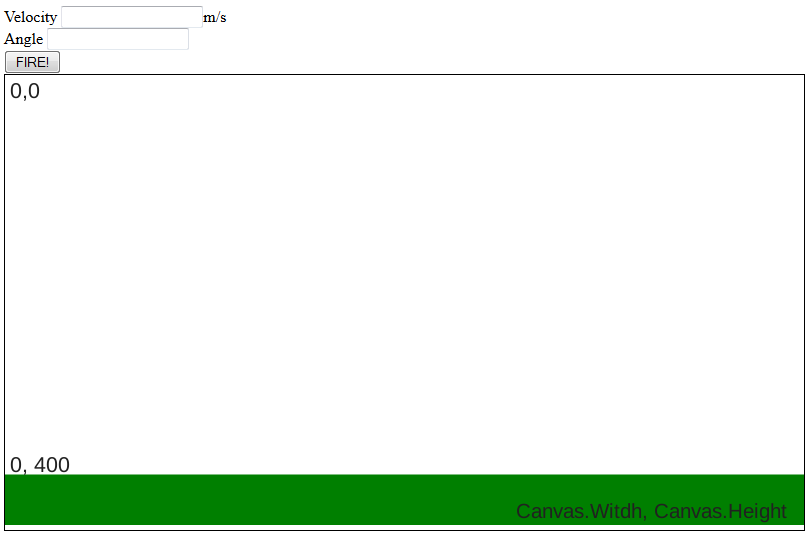
At this point if you run the page which is basic HTML5, you should see something that looks like this: 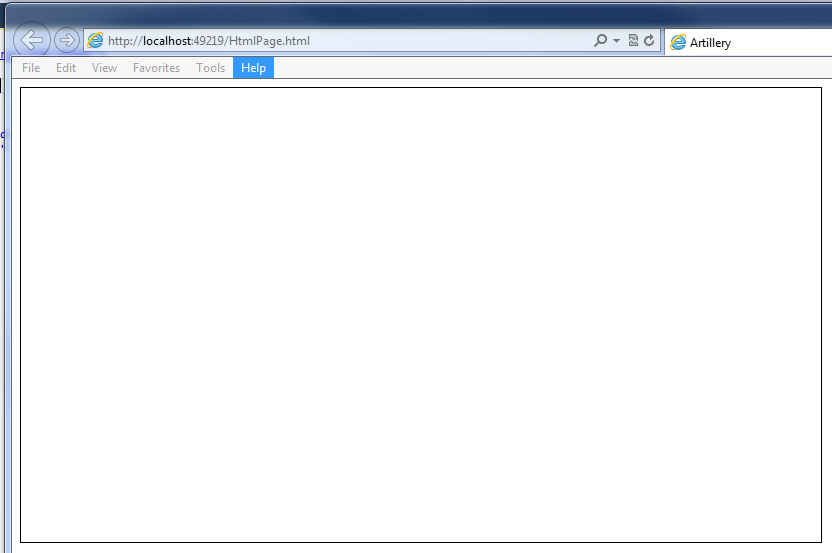
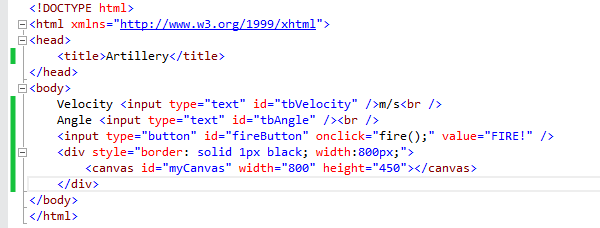
Not terribly exciting, but it is the foundation for things to come. Next, we want to add two text boxes and a button with labels above the div. You will want to set the id on the first textbox to velocity, the id on the second textbox to angle and the id on the button to fireButton. If you don’t know how to make a button or textbox, that is ok. The code to do so is below. Your html should look like this:
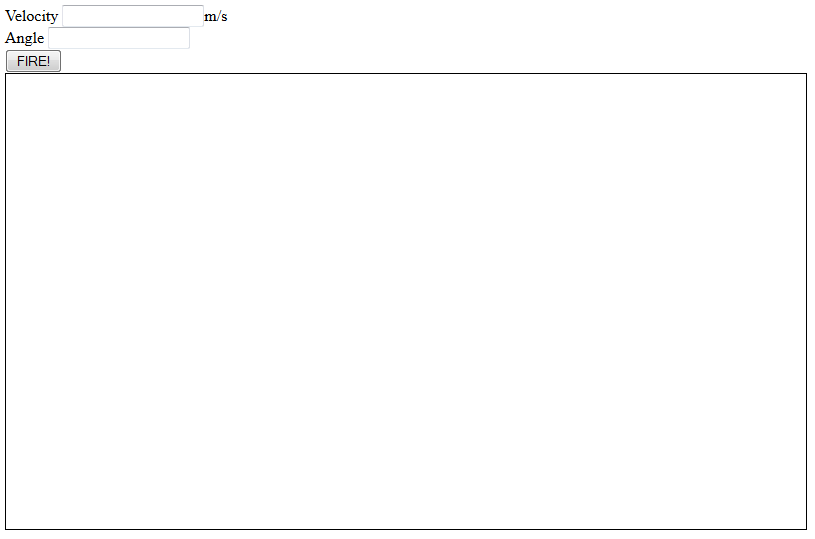
On the input type button we added a value attribute for “FIRE!”. The value attributes on an input type of button is the text that will appear on the button. So now if we run the page it will look like this:
The Javascript:
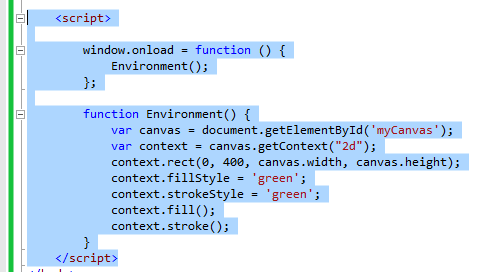
Let’s start off by adding a couple of script tags to the page. Then, we will add a function for window.onload. This does just what it says. When you load the page the function is called. We will also make a function called Environment which will create our ground.
I put the code under my div tag. It should look like this:
You can see in the code that we created a function called Environment. Inside the function we have two variables: Canvas and Context. Canvas represents the actual control on the page. If you want to, you can learn more about the canvas object. Context is an object that provides methods and properties for drawing and manipulating the canvas control. The context object lets you change colors, line widths, fonts and other properties of the canvas.
So what does this particular code do? In short it draws our ground. It draws a rectangle starting at 0 on the x axis and 400 pixels from the top of the canvas control, down to the bottom right corner of the control. (Controls on the webpage by default are measured from the top left when you are using coordinates. This is why the dimensions of our rectangle were important.)
Next we will write the code that will simulate the projectile. To do this we will define points along an arc by specifying the velocity of an object and the angle of departure. We are cheating a little when we do this because we are not accounting for friction on the X axis, but we are accounting for gravity. This is most likely not correct ballistic physics, but it makes the game work and that’s what matters, right? So, lets look at the math we are using to calculate the vectors for our projectile.
We are dealing with four variables: time (T), velocity (V), gravity (g) and theta (θ). Theta is angle of our projectile. In order to plot the vector for our projectile we need to map it’s coordinates at regular intervals of time. We use T…Tn to name each of these time intervals. There are also three formulas that we use to calculate the x and y coordinates of our projectile at every interval of time. These are listed below:
Vy = VT(sinθ) + T + 1/2gT
Vx = VT(cosθ) (for simplification we are keeping Vx a constant)
Vt = V — 2.5T
Thankfully, we don’t have to DO all the math, we just need to be able to type it into the code but I wanted you to have at least a rudimentary understanding of what’s going on. If you have not yet had any experience with Trigonometry (sine and cosine) the following video from Khan Academy might be helpful as a basic primer:
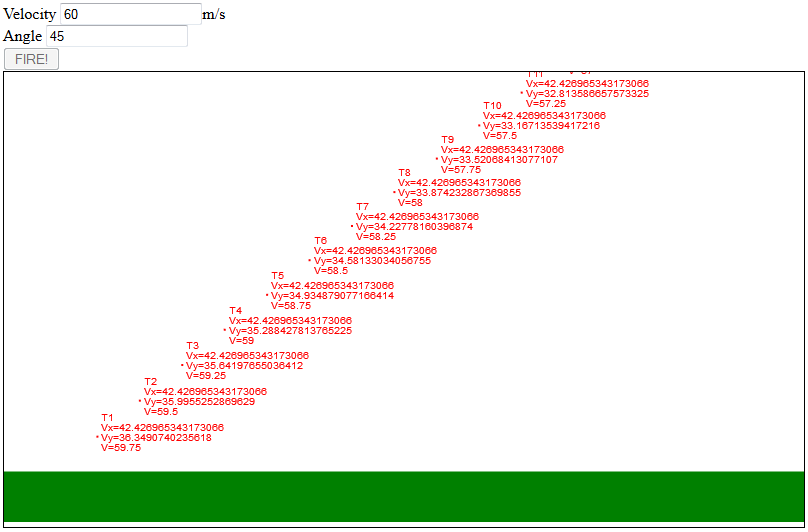
The picture below will serve as a visual explanation of the calculations that our program will make. If you click on the image to make it larger you will see that each point of the arc vector is labeled with a T interval (T1, T2, T3, etc). For each of these intervals you will see the calculation for Vy and Vx and Vt. You will notice that Vy changes as the height of the projectile changes (this is the T + 1/2gT part of the equation).
Do you see that Vx stays the same for each T interval? Remember I told you we would keep this value a constant? In reality it is not a constant – if you think about a bullet whizzing through the air and you measure the distance it travels every second; in the first second it will have traveled further than in the next second. That would mean that the distance from T1 to T2 would be greater than the distance from T2 to T3. We don’t want to deal with that so we are making all our T intervals the same – that’s what it means by keeping it constant.
You will also notice that the value of V also changes. That is the change in velocity due to our projectile slowing down over time. For each interval of T it is going slower than in the previous interval.
In order to code this math, we have to put it into a form that the computer will understand. Our code formulas will look a bit different than those written above, but they do the same thing. Also we will need to enter a value for gravity and convert the value of θ from degrees to radians.
First gravity: Our gravity is 32.8 ft/s but we will use the value 9.8 which is a metric conversion. This is really arbitrary, however, because we aren’t reflecting reality – we are making our own world so you could likely use whatever value you like. You can see the value of gravity in the line commented, “//Add gravity to Y”
Now, Θ: To convert an angle from degrees to radians you multiply it by π/180. If you want you can learn more about Radians.
Finally, we can build our function to draw the object along a path! We will do a bit of HTML5 trickery to get it to appear in intervals.
Let’s create a function called fire(). In that function we will gather the values entered in the textbox angle and in the textbox velocity. We also want the canvas control so that we can reference it while drawing and placing items. We also want the fire button so that we can disable it while we are calculating the objects flight.
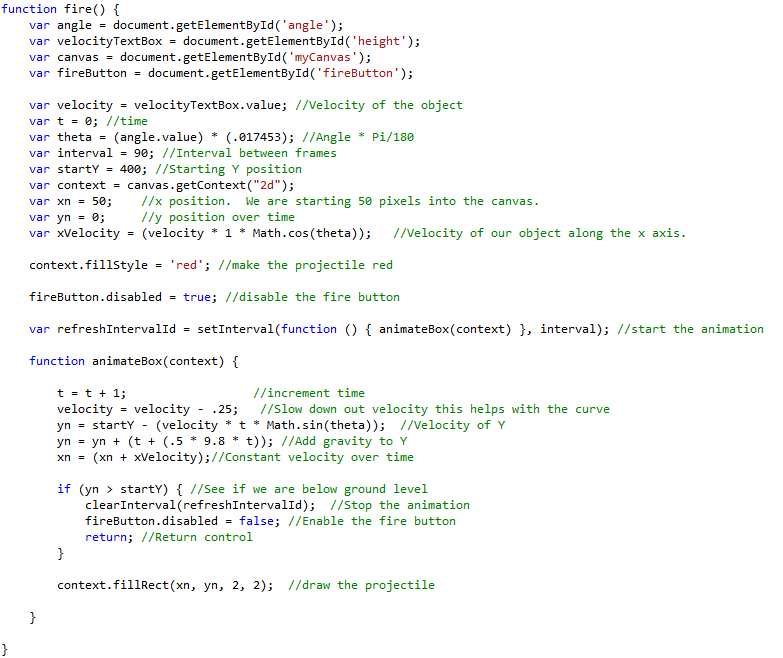
Your starting fire function should look like this.
 Instead of calculating Θ every time we do a loop let’s create a variable for it so we only have to calculate it once. This saves processing time. We will also set our starting value for x and y and our velocity for x.
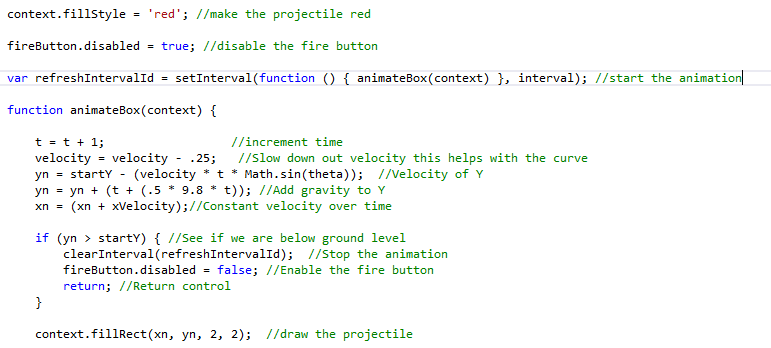
Inside the fire function we will make a function to handle the animation called animateBox(). Inside animate box we will disable the fire button, and calculate the positions of the projectile along the arc. We will also check the y coordinate on every iteration so that we will know when the object passes below the level of the ground, so we can stop drawing. Lastly we will draw the projectile on the canvas.
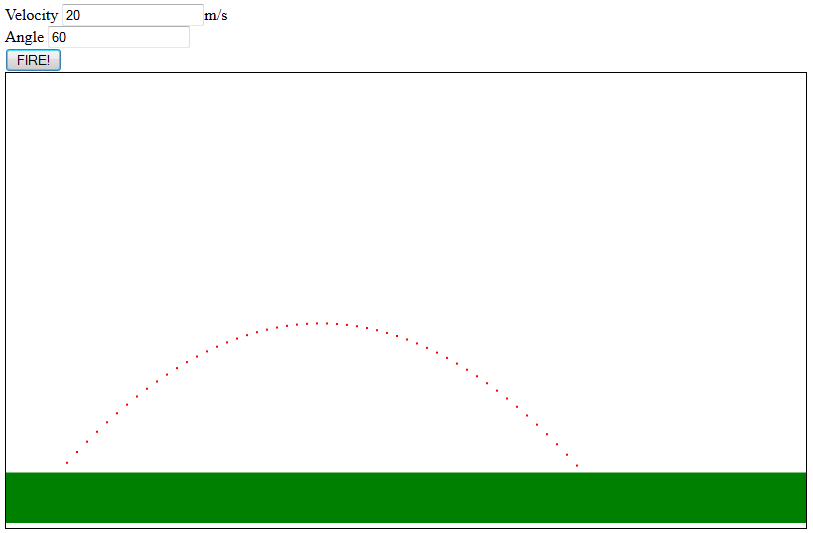
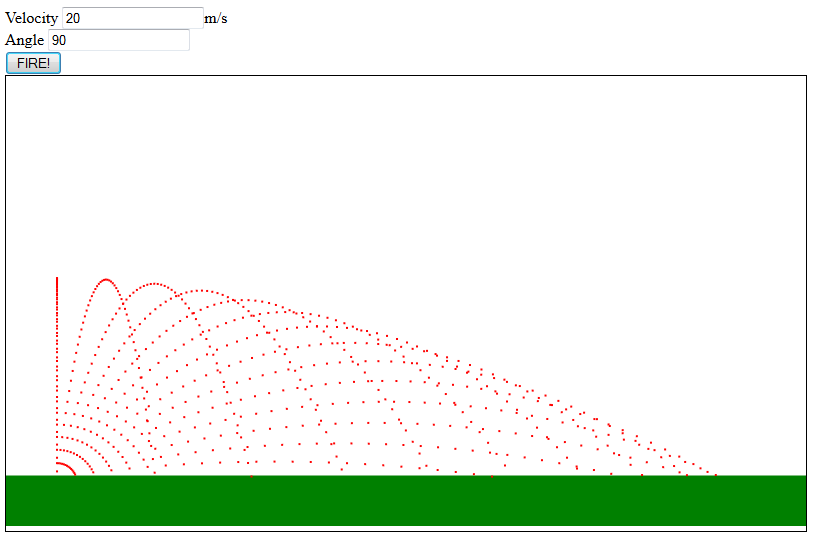
If everything goes well, you should be able to start the application, enter data for the velocity and angle and click fire and have a result that looks something like this:
The entire function should look like this:
Here is where I tested the same velocity with multiple angles (90 to 25 degrees)
You can download the complete source code or view the Artillery page here. If you have any questions, or have a hard time with this project, please leave a comment below. I’d also like to hear if you have any suggestions for improvement. In the next installment we will be adding a mountain and discussing arrays.


Hi,
So, I got the files, double click automatically opens them in IE with a textbox labled Powder Kegs, on labled Angle, and a button labled FIRE! I enter in 20 kegs, 30 degrees, click FIRE! button, nothing happens. I expected to see the parabola. Please assist. Thanks,
John