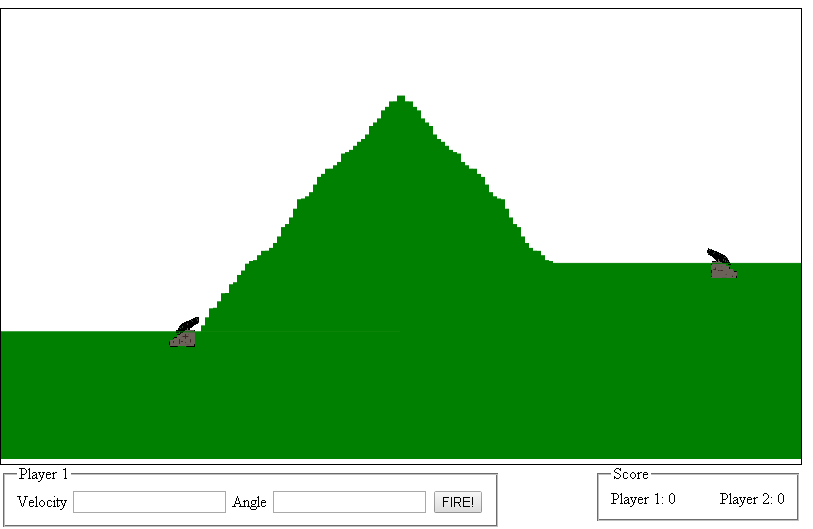
For our last installment of Artillery, we will be adding a second player, formatting the angle and velocity inputs and keeping score of our hits. To start, lets reformat the input area of our webpage so that the text boxes line up. To do this we will put our controls inside a fieldset and encase our labels inside label tags. Basically we are going from :
![]()
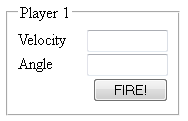
To

By assigning the labels to the text boxes and putting them in a fieldset we can control how they are formatted. This also provides us the benefit of a legend so that we can show which player is currently active, but we will get to that in a moment. Next we need to create some styling for these elements. We do this by using CSS inside a style tag. CSS stands for Cascading Style Sheet and is the standard for formatting web page content. It allows you to do many things such as setting font size, positioning elements, and generally controlling the look and feel of the elements on a page. Here is what our fieldset looks like without styling.

Here is what it looks like when we apply styling:
The CSS we used to accomplish this is pretty straight forward, so lets get into it now.
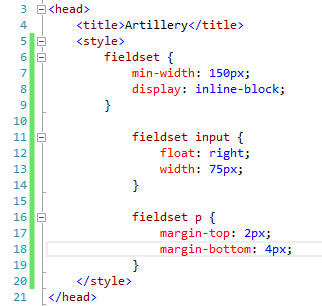
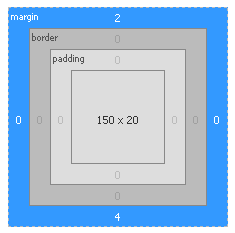
Add the style tags to the header of the page. In this case, all the rules we set up for this page involve the fieldset tags we use for our input variables. For the fieldsets we set the minimum width to be 150px, and for it to display items in line and justified. The formal definition from www.w3schools.com is:

We then specify that input boxes, such as angle and velocity, that are contained in a fieldset will be right aligned and 75px wide. We also specify that paragraphs (<p>) inside fieldsets will have a top margin or 2px and a bottom margin of 4px.
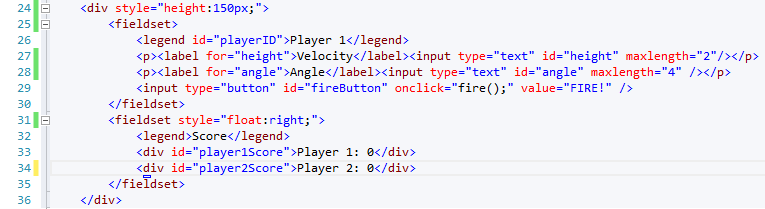
Now that we have our inputs formatted lets add an area to keep score. To do this we will add a second fieldset, with 2 labels and set it to align with the right hand side of the screen. Here is what this code should look like:

Together with the first fieldset our new code should look like this:
The resulting input boxes look much better than they did before we formatted them.

Now that we have styling issues out of the way let’s consider what we need to change in order to allow a second person to play Artillery with us. The first thing we need to do is give them a cannon. They can’t shoot from a target so we will just take the first image and flip it horizontally in a photo editor and update the target img to use that url. While we are at it we should also change the IDs of each of the cannons to be player1 and player2 so that we can track them later. Your changes should look something like this when complete.
![]()
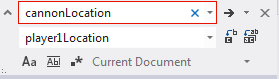
Next we need to add the variables player2Location, p1Score and p2Score to our form and rename the cannonLocation variable to player1Location. When renaming cannonLocation, if you are using visual studio, press crtl+h, type cannonLocation in the first text area and then player1Location in the second text area and then click  to replace all instances of cannonLocation. You will want to do the same for cannon and target, but make sure to select for the whole string only.
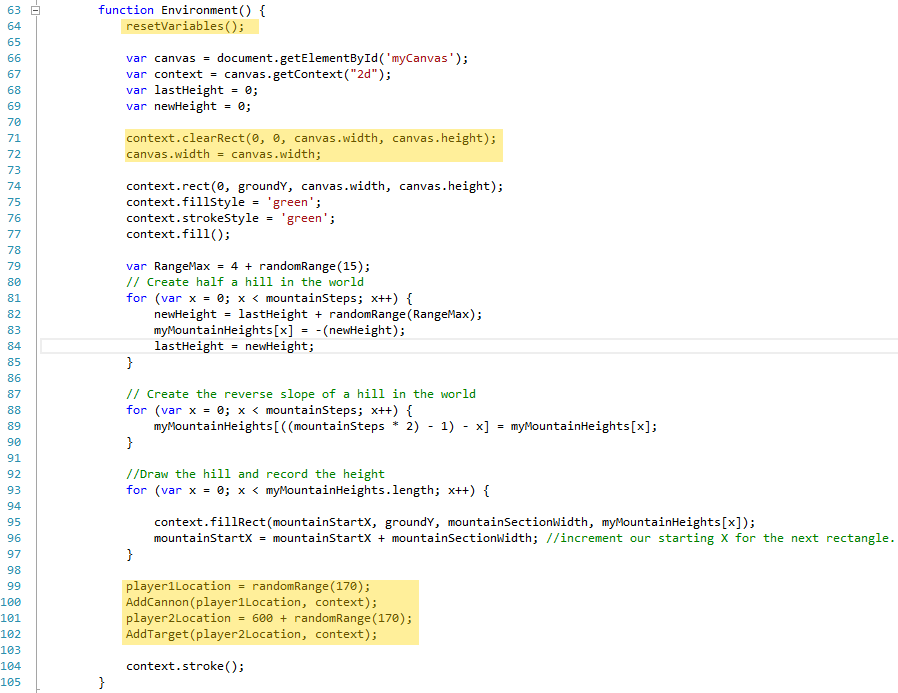
Next we need to update the Environment function. Since we want to play multiple rounds and keep track of score, we will need to refresh the canvas between games. To do this we will need to clear the screen by either drawing a clearRect over the entire canvas or resetting the canvas width. Both methods seem to be problematic at times depending on the browser you are using so we will call both.
Next we will update the code to place the cannons on the screen. The only real change here is that we will now also record the location of player2 so that we can handle firing from that position and collision detection in case of a hit. Here is what the Environment function should look like with the changes highlighted.
Hold on. I forgot to talk about the resetVariables function. Remember in the last iteration of Artillery we set the target and the cannon to move every time. Since we are now doing this with players and want to keep score we can’t simply F5 the page. We have to reset the variables programmatically. Enter resetVariables().

This function should contain any parameter that we need to change when we start a new round. The function should clear the mountainHeights array, the 2 player locations, and set the fire button back to ready.
Next we need track which player is shooting by updating the fire() function. The first change will be to add a Boolean variable for which player is shooting. Then we will add variables to track the score as the game progresses and finally we need to find the legend element playerID to display the score.
First we will add the variables at the top of the application just under player2Location.
![]()
Now that we have a place to hold the score lets update draw impact to not only update the score variables but display the score on the screen. A new function called updateScore(player) which will be called drawImpact will handle this change.
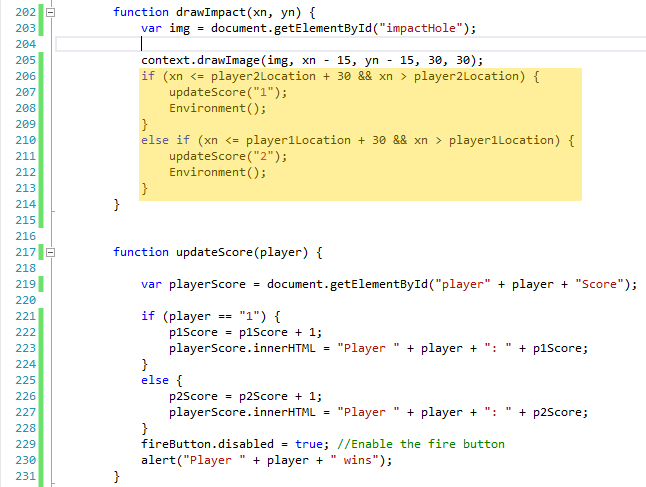
While we are in drawImpact we should go ahead and make the other changes necessary for this to be a 2 player game. The first change will be to see if we scored a hit on the opposing player by determining if the projected impact was within the bounds of the impact crater. If it is then we want to update the score to reflect a hit. In updateScore we dynamically call the corresponding element in the fieldset we added earlier. We also add 1 to the correct players score and show a congratulatory message to the victor. (Mine just says Player whatever wins, but it could say anything really).
With that done, we can return to drawImpact where we call the environment variable to reset the screen and prepare for the next round. But wait – we forgot to update the fire method and change whose turn it is.
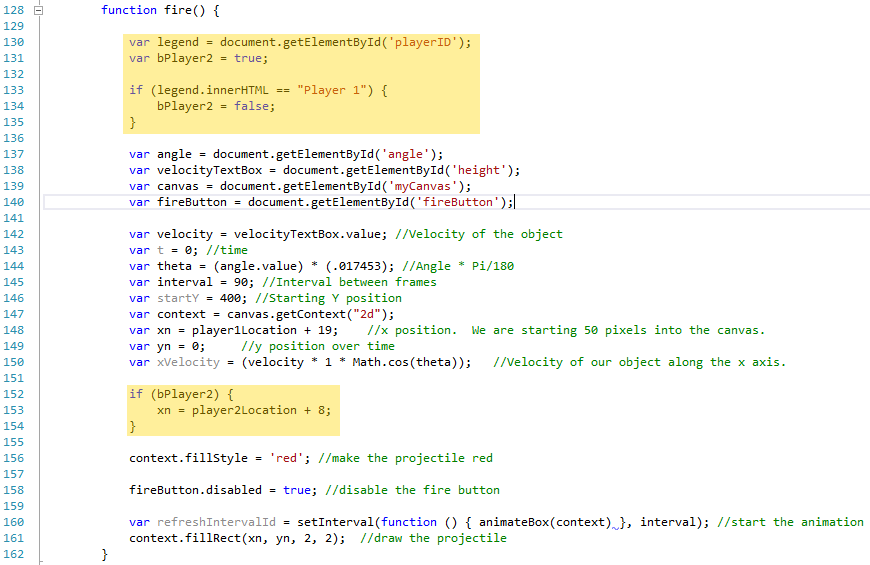
To update fire we should determine who went last by looking at the text in the “playerID” element. Then update the Boolean used by this and the subsequent functions to determine whose turn it is. That second highlighted code is really for aesthetics. We want the projectile to come from the muzzle of the cannon (or close to it) so we had to offset the starting x point by 8 to get it there. If you are using a different drawing you will need to change this accordingly.
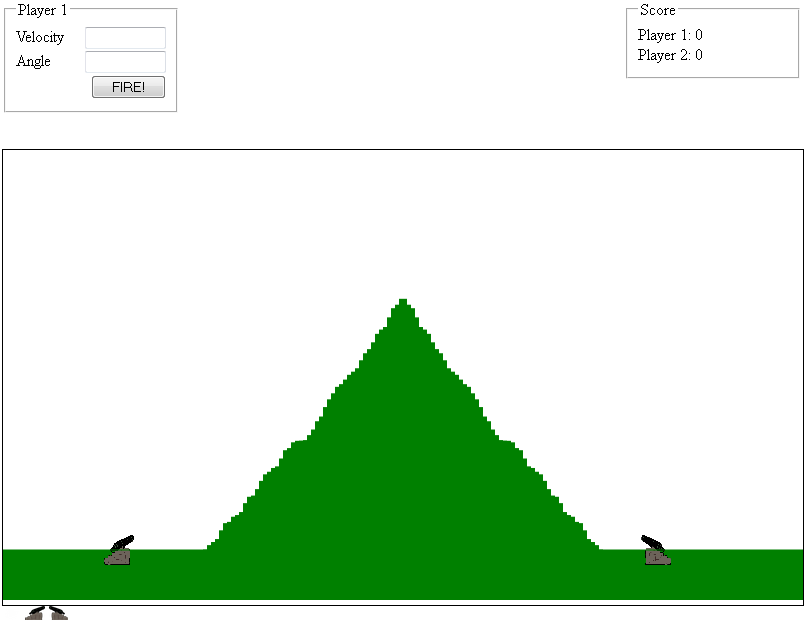
And that is it. You should be able to play a game of artillery with the code we have now.
Feel free to modify and expand on this code. Here is a further modified version that I wrote after completing this article. What modifications and improvements can you make?