
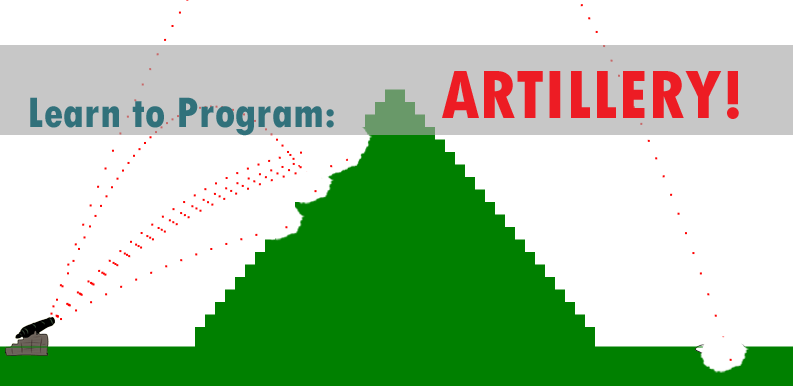
For this installment of Artillery, we will add a cannon and a target and randomize the locations in which they are rendered. We will also randomize the mountain and give it a slightly smoother look.
Let’s start by adding the cannon and target images to the page. We will add them right under the impact crater image we added last time. The code should look like this:
![]()
Next we will add the cannon and target to the Environment function and give them a set position on the scene. To do this, I created two functions AddCannon(xLocation) and AddTarget(xLocation).
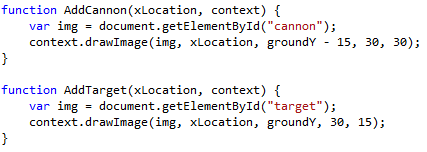
These functions let us specify exactly where on the x axis we want to place our cannon and target. Remember the origin (0,0) for everything is the upper left of the object. So we subtract 15 from groundY for the cannon so that the top of it is a little above ground. We could also raise the target as well, but I think it looks better on the green background. You should also notice that we rendered the images as different sizes which you can see in the parameter ‘30,30); and ‘30,15);’. Next we add the following lines to the bottom of the Environment function right before ‘context.stroke();’.
![]()
Now we should have something that looks like this:
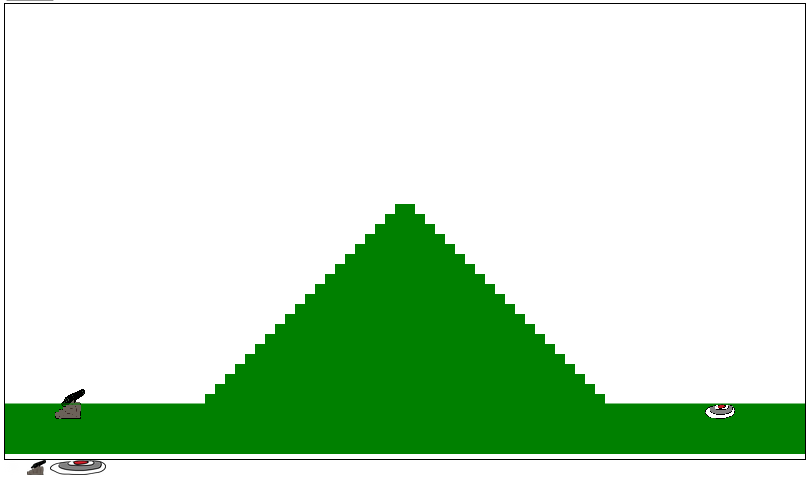
Play around with this a little and see if you can hit the target before we move on to the next steps of randomizing locations and mountain heights.
Done? Ok, let’s randomize.
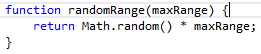
Random numbers are simple in javascript. You just call ‘Math.random()’ which will return a decimal between 0 and 1. We will leverage this by creating a function named ‘randomRange’ and pass it a value of ‘maxRange’.
Now that we have this we can update the calls to ‘AddCannon’ and ‘AddTarget’. We will also need to add a variable for the cannon location called ‘cannonLocation’. We will use this when we call fire so that we know where to start drawing. The new code at the end of environment should look like this:
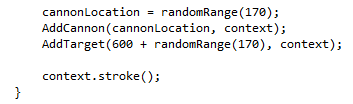
We use 170 as the range because the image is 30 pixels wide and we don’t want them to go off the screen or be buried in the mountain. We added 600 to ‘AddTarget’ because the mountains is 400 pixels wide and starts 200 pixels from the left side of the screen.
We also need to update how we initialize xn in the fire function. After a little experimentation I decided that ‘cannonLocation + 19’ gave a pretty good result as a starting point for the projectile.
![]()
Lastly we will tackle the mountain. First, we will increase the number of rectangles that make up the mountain. This is done by setting ‘mountainSectionWidth’ to 4.
![]() Second we want to make two new variables inside the Environment function called ‘lastHeight’ and ‘newHeight’ so that we can record where we left off on drawing the mountain.
Second we want to make two new variables inside the Environment function called ‘lastHeight’ and ‘newHeight’ so that we can record where we left off on drawing the mountain.
![]()
Now that we have our reference for the last point on the mountain we need to update the ‘for loops’ that lay it out.
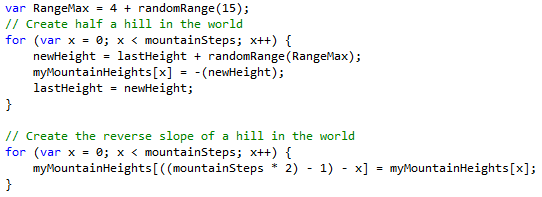
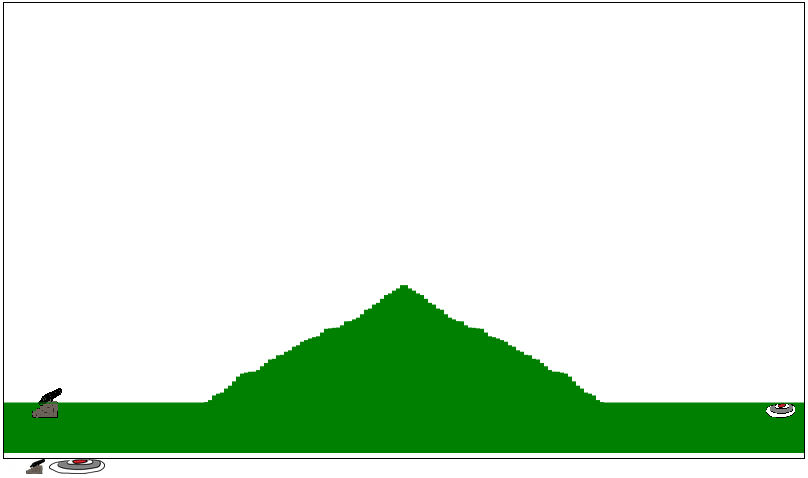
You will notice I also added a variable for ‘rangemax’ to make sure the mountain is different every time we draw it. The other changes to note are where we set ‘newHeight’. Once these changes are made in the environment function we can run it again and we should have something that looks like this:

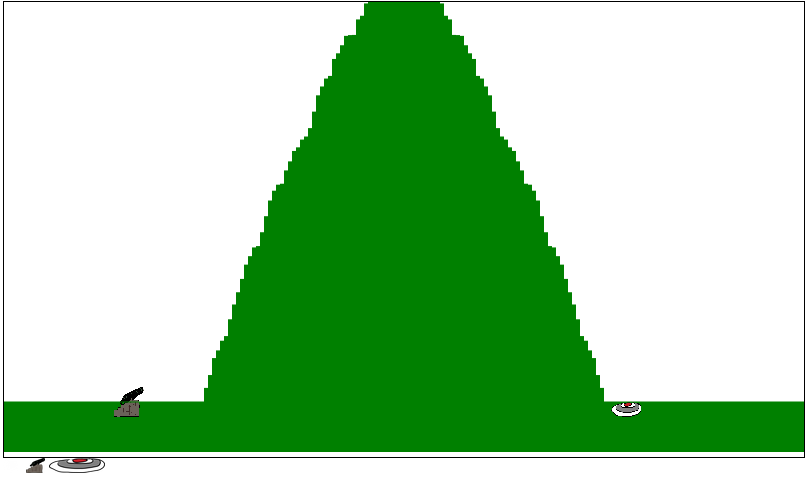
Or this:
Or even this;
Thanks for taking the time to read this tutorial. If you have any questions please leave a comment below. As always you can view the complete source code here or view the page here. I’d also like to hear if you have any suggestions for improvement.
In the next installment we will add a second player and keep track of how many times you successfully hit your opponent.
If you found this post interesting and are following along with our tutorial take a moment to click the ‘Like Us’ button and sign up for our newsletter in the sidebar.